Mochi (Japanese: 餅, もち) is a Japanese rice cake made of mochigome, which is short-grain glutinous rice.
Mochi is a traditional Japanese food that is eaten all year round, but it’s particularly popular around Japanese New Year. In Japan, it is traditionally made in a ceremony called mochitsuki.
Fresh mochi is sweet and delightfully chewy, and you get the most out of the flavors and textures when you make it yourself.
Cooled mochi can be tossed in toasted soybean flour and eaten as a sweet snack or used as an ice cream topping. In this recipe, we’re going to go the extra mile and make Daifuku, which is made by wrapping the sticky rice dough around a simple red bean filling.
What is Daifuku?
Daifukumochi (大福餅), or daifuku (大福) translates as “great luck” in Japanese, which explains why these are a popular treat to see in the new year.
Daifuku is a variation of wagashi (Japanese confection) and consists of a small round mochi stuffed with a sweet filling, most commonly anko, which is a sweetened red bean paste made from azuki beans. In Japan, this sweet treat is commonly served with green tea.
How to Make Red Bean Mochi
Ingredients
For the red bean paste (anko):
- 1 cup/200 grams dried azuki beans
- ¾ cup/150 grams sugar
- ¼ teaspoon salt
For the mochi dough:
- Potato starch, for dusting
- 1 cup/150 grams mochiko flour (also known as sweet rice flour or glutinous rice flour)
- ¾ cup/150 grams sugar
Method
Step 1: make the filling
First, you’ll need to rinse the beans and transfer them to a large pot. Cover the beans with water and bring to a boil then swiftly drain. Cover the beans with water for a second time, this time bringing them to a simmer until they are completely tender.
This will usually take about an hour to an hour and a half, and you can add more water if necessary to keep the beans submerged. Once soft, drain the beans.
Purée the drained beans in a food processor or blender to create a smooth paste. If the beans are too dry and aren’t blending properly, add a few tablespoons of water to soften the mixture.
Once you’re satisfied with the consistency, return the bean purée to the same pot and add sugar and salt, then stir.
Cook the puree over medium-low heat, stirring occasionally, until most of the water has evaporated and the purée is thickened, which usually takes 10 to 15 minutes. Transfer the bean paste into a wide, shallow container and refrigerate it until firm and cool.
Step 2: make the mochi dough
While the paste is cooling, you can make the mochi dough.
Line a sheet pan with a piece of parchment paper and pour a generous heap of potato starch in a large circle, then set the pan to one side. In a bowl, whisk the mochiko flour and 1 1/3 cup/300 milliliters water together until smooth.
Pour the mixture through a mesh strainer into a saucepan, using the whisk to push it through if required. Add the sugar and mix well. Using a heat-proof spatula, cook the mixture over medium heat for 5-7 minutes, stirring constantly.
The mixture should thicken and come together into a shiny mass that can hold its shape.
Dust a knife in starch, and then cut the dough into 20 even pieces. If you want to eat the mochi plain or use it as an ice cream topping, cut it into 40 to 50 smaller pieces.
Sprinkle potato starch liberally on the surface to keep the dough from sticking. Use a rolling pin to roll each piece of mochi dough into a thick, flat disk which is roughly 2 inches x 2 inches.
Step 3: add the bean paste filling
Now grab your refrigerated bean paste, and roll a tablespoon of the paste between your hands to form a ball. Place the ball in the center of the rolled-out dough piece, then use your fingers to evenly stretch the mochi dough up and around the filling without squishing it.
Pinch the dough shut at the top to seal the mochi, then gently roll the mochi between your hands until the shape is fully rounded. Place each mochi ball on the parchment-lined baking sheet with the seam facing downwards.
When to eat
Enjoy your red bean mochi the day it’s made, as this is when they’ll taste their best. To save them for later, cover and store in the refrigerator but consume within 1 day.
Other varieties of mochi to try
Mochi comes in many different flavors and varieties, and you can have fun tasting them in a Japanese restaurant or making them yourself at home. Of course, the best way to try mochi is if you are lucky enough to visit Japan!
Ichigo Daifuku
Ichigo (strawberry) is the same as the red bean mochi featured in this article but also contains a sweet strawberry.
Bota Mochi (Ohagi)
This is a daifuku mochi turned inside out, so the mochi ball is on the inside and the filling, such as anko, is coated on the outside.
Kinako Mochi (Abekawa Mochi)
Best enjoyed freshly made and warm, this type of mochi is sprinkled in kinako (soybean powder) and sugar.
Kiri Mochi
This is when the mochi is cut into rectangles in its preserved state. These can be added to various dishes or grilled.
Isobe Maki (Isobe Yaki)
Sobe maki or Isobe yaki consists of individual pieces of mochi that are grilled, wrapped in a sheet of nori seaweed, and dipped in soy sauce. Isobe maki is also best served warm and freshly made.
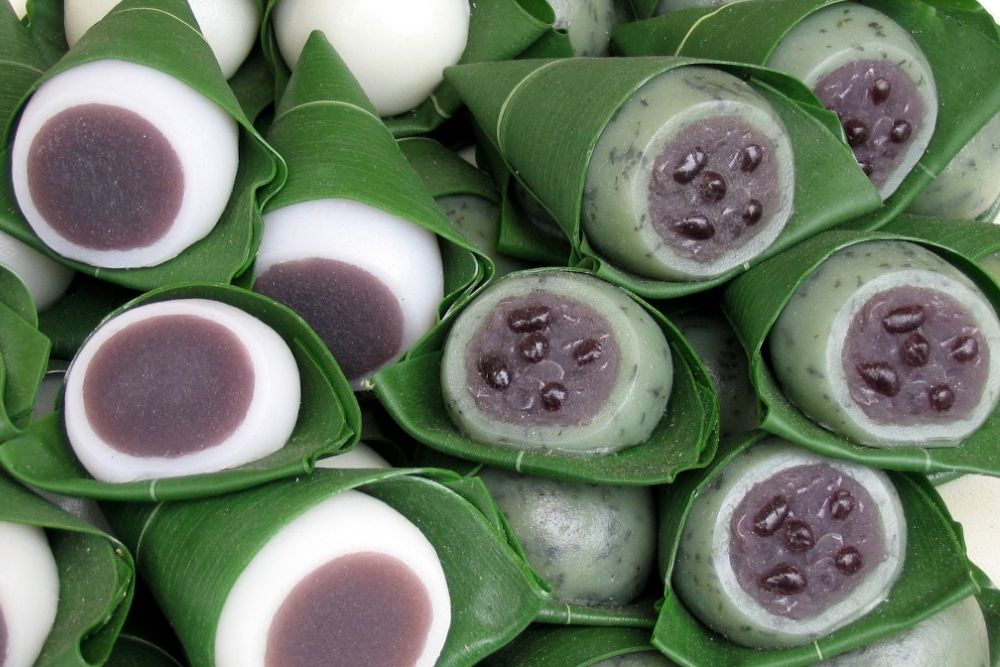
Kusa Mochi
Kusa Mochi, which translates to “grass mochi” is made from yomogi (mugwort) and is naturally green in color. It tends to have an earthy fragrance and often has an anko red bean filling. It’s usually sold in the springtime in Japan.