We live in a big wide world, one that is made up of various cultures each with their own architecture, fashion and food.
If I had to pick my favorite worldly cuisine, then I would have to choose Chinese – especially when that Chinese food has been cooked with tender love and care.
Now we all have that one dish that we associate with Chinese culture, from saucy chow mein to fat lion’s head meatballs. But we never stop to appreciate the sweet treats this wonderful country is known to produce.
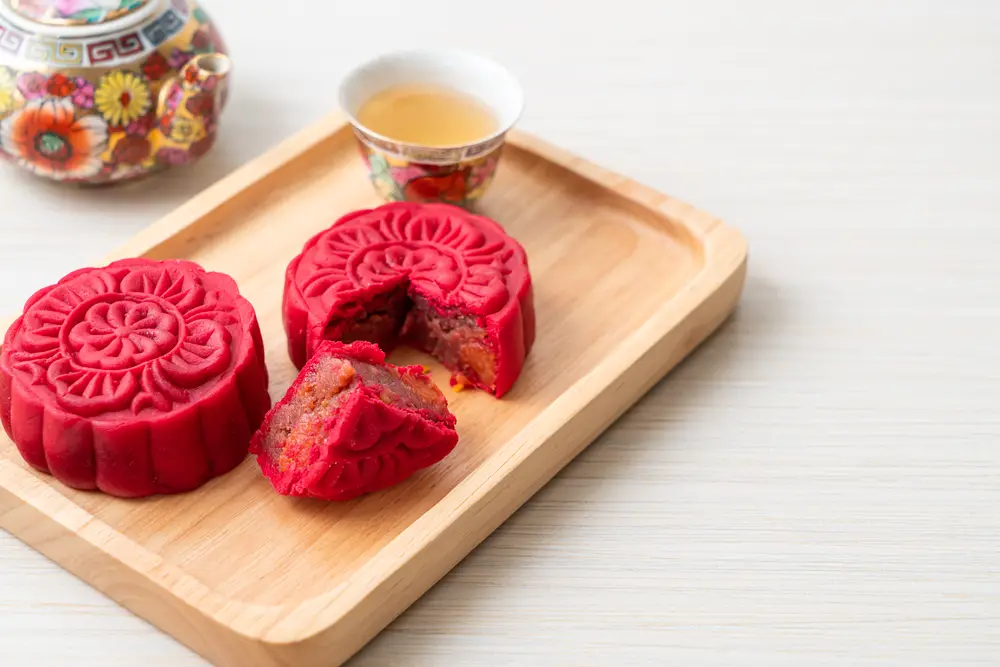
That is why I have reached into my book of recipes to find the perfect dessert for fans of Chinese cuisine – and it’s called the red bean mooncake.
Mooncakes are delightful pastries that are steeped in Chinese history and culture. They are traditionally made during the Mid-Autumn Festival – a traditional celebration throughout eastern Asia that honours the full moon.
Not only are these cakes (your taste buds can’t resist this yummy Chinese Birthday Cake Recipe) historical, but they are also sweet, aromatic and delicious. Down below I have outlined the method used to create these decadent desserts – so that you can bring the essence of China into your home.
Step One: Make The Dough
Ingredients:
- Golden Syrup (3-4 cups)
- Vegetable Oil (6 tbsp)
- Food Grade Lye Water (1 tsp)
- All-Purpose Flour (2-3 cups)
When you imagine cake, you probably see images of spongy desserts brimming with cream and jam – but mooncakes are not a sponge cake.
Instead, mooncakes are made from a parcel of red bean paste that has been surrounded by a rich and sweet pastry. And this is where we begin the baking process.
Take a large mixing bowl and mix the golden syrup, lye water and vegetable oil until they are combined. Then add the sifted flour and knead the mixture until it is well incorporated and has no remaining marks – this will take about 3 minutes.
When the dough is fully realised, wrap it in plastic and let it rest for 2 hours. It is best if you set it somewhere warm and dry.
If you wish you can replace the golden syrup with honey for a more floral flavor. However, adding honey will also mean removing the lye water from the recipe, as honey is not an acidic substance.
Mooncakes made with honey are also lighter, which can make them crumbly. I prefer golden syrup for that authentic mooncake taste.
Step Two: Make The Filling
Ingredients:
- Azuki Beans (1 ½ pound)
- Water (3 cups)
- Sugar (1 cup)
- Vegetable Oil (3 tbsp)
To make the red bean paste from scratch you must first soak the azuki beans in cold water for 2 hours or overnight. In the morning rinse and dry the beans before transferring them into a large pot.
Place the pot over low heat for 2 hours and add a half cup of water every 30 minutes.
While doing this the water will evaporate and you should find yourself with a pot of mushy azuki beans. Add 1 cup of sugar into the pot and use a blender to blitz the beans until they are smooth.
If you wish to bypass this part of the recipe, then you can purchase ready-made red bean paste from the Asian market.
If you wish to use ready-made paste, then you add it to a saucepan with half the vegetable oil and stir vigorously for around 2-3 minutes.
Pour in the rest of the oil and stir the paste thoroughly until the oil has been combined – this process should take about 9 minutes. The paste itself should have a heavy consistency, similar to peanut butter or Nutella.
Take the paste and transfer it to a plate and allow it to cool for around 1 hour, once cooled the paste will take on a putty-like quality, which will make it easier to work with.
Step Three: Assemble The Mooncakes
This is where things will start getting tricky! Find a kitchen scale and measure 2.6 ounces of the filling at a time. Take the amounts and form the filling into small balls using your hands, before placing them on a plate – do this until there is no filling left.
Then repeat the process with the dough, measuring out 1.8 ounces of it at a time. Form each piece of dough into a ball using your hands, adding a sprinkling of flour if they are sticky. Once complete, transfer the dough balls to a place and wrap them in plastic.
Dust a kitchen surface with flour and take a ball of dough, you should be able to turn the dough into a 3-inch disk using the palm of your hand.
Place a single ball of filling into the middle of the disk and then wrap the dough around it until the filling is completely covered.
Place the ball into your mooncake mould and then sprinkle it with some flour. Put the mould onto a parchment-lined tray and press the stamp down before releasing the mooncake onto the tray.
Make sure to cover the tray immediately with plastic before continuing the process until you have no more filling and dough.
Once this has been done, spray the mooncake with some water and allow them to rest for a further 30 minutes. The water will stop the mooncakes from becoming damaged.
Step Four: Bake The Mooncakes
Take a baking rack and place it on the middle shelf of your oven before preheating the oven to 400 degrees Fahrenheit. Just before placing the mooncakes into the oven, I recommend sprinkling them with some more water for security.
Transfer the mooncakes into the oven and allow them to bake on the rack for 5 minutes. When this time has passed, remove the mooncakes and allow them to cool before brushing them with a mixture of egg yolk and water.
Do not apply the egg wash while the mooncakes are still warm, or this could risk ruining the batch.
Reduce your oven’s temperature to 375 degrees Fahrenheit and then place the mooncakes back on the rack for a full 10 minutes. Once fully cooked, you can remove the cakes and allow them to cool for half an hour.
Then you can place the mooncakes on a cooling rack for a further 2 hours. Store the cakes in an airtight container before serving them to your loved ones.
Enjoy another of our tasty cake recipe by checking out the red bean cake recipe.